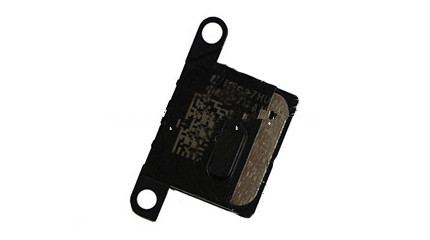
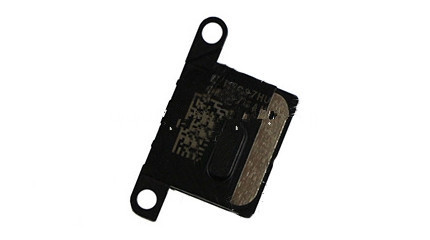
- Earpiece Speaker for Iphone 6S Parts
- Category:iPhone 6S parts
- Model:
- View:2153
Detail
Earpiece Speaker for iPhone 6S Parts
This is 100% new and original Earpieces Speaker for iPhone 6S parts. Not copy or refurbished. Original means top quality. We 100% tested all of them to ensure then work perfectly. It is the perfect solution for iPhone 6S Earpieces Speaker replacement.
- Weight: 5g
- Quality: new and original
- Compatible: for iPhone 6S Parts
- Package Include: 1x Earpiece Speaker
Earpiece Speaker Replacement for iPhone 6S function
It is special used to replace the damaged iPhone 6S plus Earpiece Speaker

Warranty
1.All screens are 100% tested before shipping. They work perfectly!
2.We exchange for all no-install screens! Please test all screens after package arrive. If there are any defects, please contact us for exchange.
3.We won`t exchange for installed screens! Please never install any screens before testing. Wrong operation always cause damage.
4.Please ship defective LCD back to us. After get it, we will reship it immediately. Customers pay return cost, we pay reship cost.
5.All our products have 1 year warranty before installation. If you don`t like our quality, you can return it and ask refund in 12 months.
How to Replace Earpiece Speaker for iPhone 6S ?
Step 1
Remove the two 3.6 mm Pentalobe P2 screws next to the dock connector.
Step 2
Push the rear panel toward the top edge of the iPhone.
Step 3
Pull the rear panel away from the back of the iPhone, being careful not to damage the plastic clips attached to the rear panel.
Remove the rear panel from the iPhone.
Step 4Remove the following screws securing the battery connector to the logic board:
-
One 1.7 mm Phillips screw
-
One 1.5 mm Phillips screw.
Use a plastic opening tool to gently detach the battery connector from the socket on the device. Start lifting off the connector from the bottom side, by placing the tip of the tool between the loudspeaker enclosure and the metal cover of the connector.
Step 5Use a plastic opening tool to pull the pressure contact from underneath the battery connector.
Be careful not to rip off the battery connector socket soldered on the logic board. There are 4 very small soldering points awaiting this mistake!
Step 6
Insert the edge of a plastic opening tool between the battery and the outer case near the bottom of the iPhone.
Run the plastic opening tool along the right edge of the battery and pry up at several points to completely separate it from the adhesive securing it to the outer case.
Step 7Use the exposed clear plastic pull tab to peel the battery off the adhesive securing it to the iPhone.
Remove the battery.
Step 8Remove the following screws securing the dock connector cable cover to the logic board:
-
One 1.5 mm Phillips screw
-
One 1.2 mm Phillips screw
Remove the metal dock connector cable cover.
Step 9Use the edge of a plastic opening tool to pry the dock cable up from its socket on the logic board.
Step 10
Peel the dock connector cable off the adhesive securing it to the logic board and the side of the speaker enclosure.
Step 11
Use the edge of a plastic opening tool to pry the cellular antenna cable up from its socket on the logic board.
De-route the cellular antenna cable out from under the metal fingers attached to the logic board.
Step 12
Remove the following four screws securing the cable cover to the logic board:
-
One 2.7 mm Phillips screw
-
One 2.6 mm Phillips screw
-
One 1.3 mm Phillips screw
-
One 1.2 mm Phillips screw
Use the edge of a plastic opening tool to pry the cable cover tabs out of their slots cut into the EMI shield on the logic board.
Lift the cable cover from its edge nearest the top and remove it from the iPhone.
Step 14Use the edge of a plastic opening tool to pry the cable cover tabs out of their slots cut into the EMI shield on the logic board.
Lift the cable cover from its edge nearest the top and remove it from the iPhone.
-
Use the edge of a plastic opening tool to pry the rear camera connector up from its socket on the logic board.
-
Remove the rear camera from the iPhone.
-
Use a SIM card eject tool or a paperclip to eject the SIM card and its holder.
-
Remove the SIM card and its holder.
Remove the five cables near the top of the logic board in the following order:
-
Headphone jack/volume button cable
-
Front facing camera cable
-
Digitizer cable
-
Display data cable
-
Power button cable (located underneath the headphone jack/volume button cable as shown in the second picture.)
Remove the 1.5 mm Phillips screw securing the grounding clip to the logic board near the headphone jack.
Step 18
Use the tip of a spudger to pry the small grounding clip up off the logic board.
Carefully grasp the grounding clip and remove it from the iPhone.
Step 19Use a small flathead screwdriver to remove the 4.8 mm standoff near the headphone jack.
Step 20More step plz go to ifixit web to study!


 anandacn


