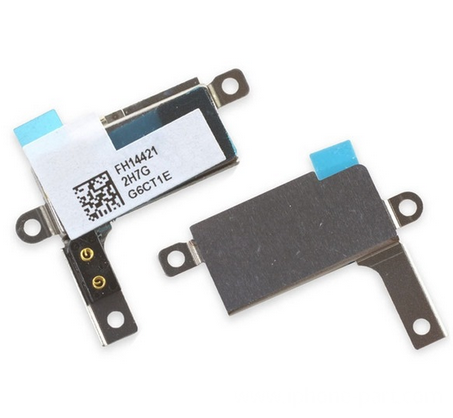
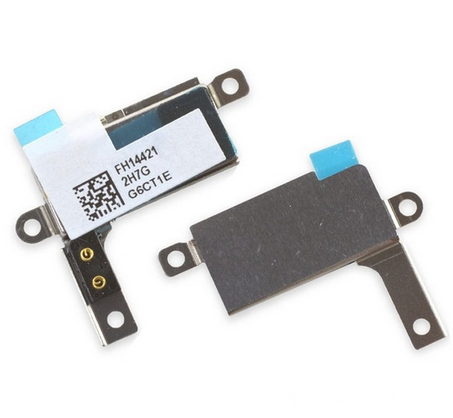
- Vibrator Motor for iPhone 6 Plus Parts
- Category:iPhone 6 Plus parts
- Model:
- View:2249
Detail
Vibrator Motor for iPhone 6 plus Parts
This is the backup parts for iPhone 6 plus vibrator replacement. It is a standard spare parts which fit iPhone 6 plus perfectly. original and new parts with 12 months warranty.
-
Original and new parts for replacement
- Weight: 5g
-
Package include: 1X vibrator
- 12 months warranty

Compatibility
- All iPhone 6 Plus 5.5 inch
How to replace vibrator for iPhone 6 Plus?
step 1.
- Power off your iPhone before beginning disassembly.
- Remove the two 3.6 mm Pentalobe screws next to the Lightning connector.
Step 2.
-
If the plastic depth gauge is attached at the center of the iSclack, remove it now-it's not needed for larger phones like the iPhone 6 Plus.
-
Close the handle on the iSclack, opening the suction cup jaws.
-
Place the bottom of your iPhone in between the suction cups.
-
Open the handles to close the jaws of the iSclack. Center the suction cups and press them firmly onto the top and bottom of the iPhone.
-
Hold onto your iPhone securely and close the handle of the iSclack to separate the suction cups, pulling the front panel up from the rear case.
-
Peel the two suction cups off your iPhone.
- If you don't have an iSclack, use a single suction cup to lift the front panel:
- Press a suction cup onto the screen, just above the home button.
Step 5.
- While holding the iPhone down with one hand, pull up on the suction cup to slightly separate the front panel assembly from the rear case.
- Using a plastic opening tool, begin to gently pry the rear case down, away from the display assembly, while continuing to pull up with the suction cup.
Step 6.
- Pull the plastic nub to release the vacuum seal on the suction cup.
- Remove the suction cup from the display assembly.
Step 7.
- Pull the home button end of the front panel assembly away from the rear case, using the top of the phone as a hinge.
- Open the display to about a 90º angle, and lean it against something to keep it propped up while you're working on the phone.
Step 8.
- Remove the following Phillips #00 screws from the battery connector bracket:
-
One 2.3 mm Phillips #00 screw
-
One 3.1 mm Phillips #00 screw
-
Remove the metal battery connector bracket from the iPhone.
Step 10.
-
Use a plastic opening tool to gently pry the battery connector up from its socket on the logic board.
Step 11.
- While holding the front panel open at about a 90º angle, remove the 1.2mm, 1.5mm, 2.9mm screws securing the front panel assembly cable bracket:
Step 12.
-
Remove the front panel assembly cable bracket from the logic board.
Step 13.
-
While still supporting the front panel, use a plastic opening tool to disconnect the front-facing camera and earpiece speaker cable connector.
Step 14.
-
Use a plastic opening tool to disconnect the home button cable connector.
Step 15.
-
Use a plastic opening tool to disconnect the display data cable connector.
Step 16.
-
Finally, use a plastic opening tool to disconnect the digitizer cable connector.
Step 17.
-
Remove the front panel assembly from the rear case.
Step 18.
-
Pry the vibrator connector cable up from its socket on the logic board with the flat end of a spudger.
Step 19.
- Use the tip of a spudger to disconnect the interconnect antenna cable from its socket on the logic board.
Step 20.
-
Grasp the interconnect antenna cable with a pair of tweezers and carefully de-route it from its channel on the vibrator assembly.
Step 21.
-
Remove the two 2.5 mm Phillips #00 screws securing the vibrator to the rear case.
Step 22.
-
Remove the vibrator from the iPhone.


 anandacn


