


- Earphone Jack Flex Parts for iPhone 4S
- Category:iPhone 4S parts
- Model:
- View:2649
Detail
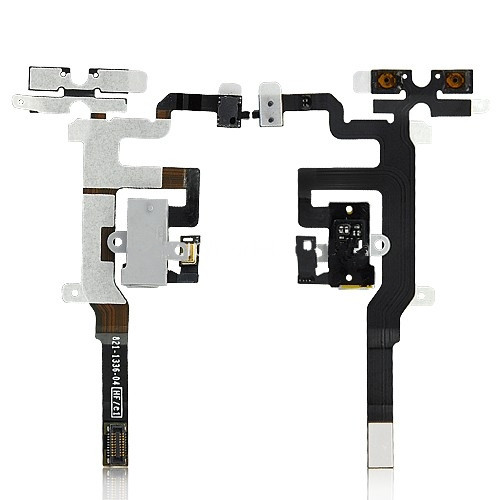
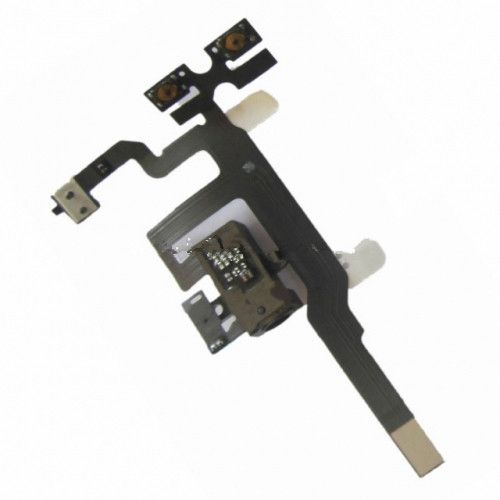
Earphone Jack Flex Parts for iPhone 4S
This is the backup Parts for iPhone 4S earphone Jack. The Earphone Jack flex cable for iPhone 4S is also called Heacphone Jack flex cable, it is in top of the mobile, which connect the headphone to the motherboad. If it is damaged, you need a new Earphone parts for replacement.
New and original Repair Parts for iPhone 4S
Weight: 5g
Color: White and black
Compatible: for iPhone 4S
Package Include:
1x Earphone Jack Flex Cable White
Earphone Jack flex cable for iPhone 4S function
This Parts is used to replace damaged iPhone 4S headphone jack flex ribbon

How to replace the Earphone flex for iPhone 4S
Step 1
Remove the two 3.6 mm Pentalobe P2 screws next to the dock connector.
Step 2
Push the rear panel toward the top edge of the iPhone.
Step 3
Pull the rear panel away from the back of the iPhone, being careful not to damage the plastic clips attached to the rear panel.
Remove the rear panel from the iPhone.
Step 4
Remove the following screws securing the battery connector to the logic board:
One 1.7 mm Phillips screw
One 1.5 mm Phillips screw.
Use a plastic opening tool to gently detach the battery connector from the socket on the device. Start lifting off the connector from the bottom side, by placing the tip of the tool between the loudspeaker enclosure and the metal cover of the connector.
Step 5
Use a plastic opening tool to pull the pressure contact from underneath the battery connector.
Be careful not to rip off the battery connector socket soldered on the logic board. There are 4 very small soldering points awaiting this mistake!
Step 6
Insert the edge of a plastic opening tool between the battery and the outer case near the bottom of the iPhone.
Run the plastic opening tool along the right edge of the battery and pry up at several points to completely separate it from the adhesive securing it to the outer case.
Step 7
Use the exposed clear plastic pull tab to peel the battery off the adhesive securing it to the iPhone.
Remove the battery.
Step 8
Remove the following screws securing the dock connector cable cover to the logic board: 1.5mm and 1.2mm.
Remove the metal dock connector cable cover.
Step 9
Use the edge of a plastic opening tool to pry the dock cable up from its socket on the logic board.
Step 10
Peel the dock connector cable off the adhesive securing it to the logic board and the side of the speaker enclosure.
Step 11
Use the edge of a plastic opening tool to pry the cellular antenna cable up from its socket on the logic board.
De-route the cellular antenna cable out from under the metal fingers attached to the logic board.
Step 12
Be wary of the outer plastic ring located on top of the rear camera's flash assembly. It can be easily displaced if not removed during disassembly.
Step 13
Remove the following four screws securing the cable cover to the logic board:
One 2.7 mm Phillips screw
One 2.6 mm Phillips screw
One 1.3 mm Phillips screw
One 1.2 mm Phillips screw
Step 14
Use the edge of a plastic opening tool to pry the cable cover tabs out of their slots cut into the EMI shield on the logic board.
Lift the cable cover from its edge nearest the top and remove it from the iPhone.
Step 15
Use the edge of a plastic opening tool to pry the rear camera connector up from its socket on the logic board.
Remove the rear camera from the iPhone.
Step 16
Use a SIM card eject tool or a paperclip to eject the SIM card and its holder.
Remove the SIM card and its holder.
Step 17
Remove the five cables near the top of the logic board in the following order:
Headphone jack/volume button cable
Front facing camera cable
Digitizer cable
Display data cable
Power button cable (located underneath the headphone jack/volume button cable as shown in the second picture.)
Step 18
Remove the 1.5 mm Phillips screw securing the grounding clip to the logic board near the headphone jack.
Step 19
Use the tip of a spudger to pry the small grounding clip up off the logic board.
Carefully grasp the grounding clip and remove it from the iPhone.
Step 20
Use a small flathead screwdriver to remove the 4.8 mm standoff near the headphone jack.
Step 21
Use the edge of a plastic opening tool to disconnect the Wi-Fi antenna from the logic board.
Step 22
If present, peel the piece of black tape covering the hidden screw near the power button.
Remove the 2.6 mm Phillips screw securing the logic board near the power button.
Step 23
Remove the following screws securing the logic board to the case:
One 2.5 mm Phillips screw near the vibrator motor
One 2.4 mm Phillips screw
One 3.6 mm standoff along the side of the logic board nearest the battery opening.
Step 24
Carefully lift the logic board from the end closest to the speaker enclosure and slide it away from the top edge of the iPhone.
Remove the logic board.
Step 25
Be sure not to lose the small grounding finger for the rear facing camera near the power button. This finger rests on top of the PCB, screwed down, and covered with the adhesive black plastic tape.
Step 26
Use the edge of a plastic opening tool to carefully pry the metal front facing camera retainer away from the case of your iPhone.
Remove the front facing camera retainer.
Step 27
Remove the front facing camera.
Step 28
Remove the 2.4 mm Phillips screw next to the headphone jack.
Step 29
Use the edge of a plastic opening tool to peel the upper antenna off the headphone jack.
Use a pair of tweezers to remove the upper antenna from the iPhone.
Step 30
Use a plastic opening tool to start to pry the headphone jack out of its recess in the rear case.
Then use the opening tool to gently peel the microphone up from the adhesive securing it to the top of the rear case.
Remove the headphone jack assembly from the rear case, being careful not to tear the microphone flex cable.
Step 31
Remove the 1.6 mm Phillips screw securing the mute switch bracket to the outer case.
Step 32
Remove the four 1.5 mm Phillips screws securing the volume button and silent switch brackets to the outer case.
Step 33
Use a pair of tweezers to gently pull the silent switch bracket away from the outer case.
Step 34
Carefully peel the headphone jack/volume button cables off the adhesive securing them to the rear case.
Remove the headphone jack cable assembly from the iPhone.
Step 35
Transfer these steel brackets to the new headphone jack cable.
Step 36
Headphone jack cable remains.
Looking for ideal iPhone 4S Earphone Parts Manufacturer & supplier ? We has a wide selection at great prices to help you get creative. All the iPhone 4S Headphone Flex are quality guaranteed. We are China Origin Factory of iPhone 4S Earphone Flex. If you have any question, please feel free to contact us.


 anandacn